
How to fit your saddle
The beauty of the Union Saddle is how it connects horse and human. The fit is essential for you to get the most from your saddle! Step-by-step instructions are below, or you can download and print an instruction sheet.
The Union Saddle is placed differently than most saddles. Use the guide below to help get a proper fitting.
-

1. Finding the Leading Edge
Locate the leading edge of the saddle, which will have the white stitches. Remove the bags if necessary.
-

2. Aligning the Saddle
The leading edge needs to be located directly above the leg within the zone shown by the green lines in the picture above. This position may feel more forward to some people who are used to riding western saddles.
-

3. Placing the Saddle
Place the saddle slightly up your horse's neck and then slide it back into position. The leading edge should be directly above the horse’s leg.
-

4. Adjusting the Breast Collar (if used)
Your saddle is shipped with the right side of the breast collar already connected and the left side hanging on the storage tab. With your horse's head and neck in the neutral/up relaxed position, connect the collar to the left side collar strap. It should be just tight enough such that you should be able to easily place your hand between the girth and neck. Too loose and your saddle may slide back. Too tight and it will be uncomfortable for the horse.
-

5. Centering the Breast Collar
Straighten the collar for even loading. Alternately loosen or tighten the right or left buckles until the logo is centered for even adjustment. The buckles should be tightened to the same number of holes on the strap on both sides. Make sure you can still place your hand comfortably in between.
-

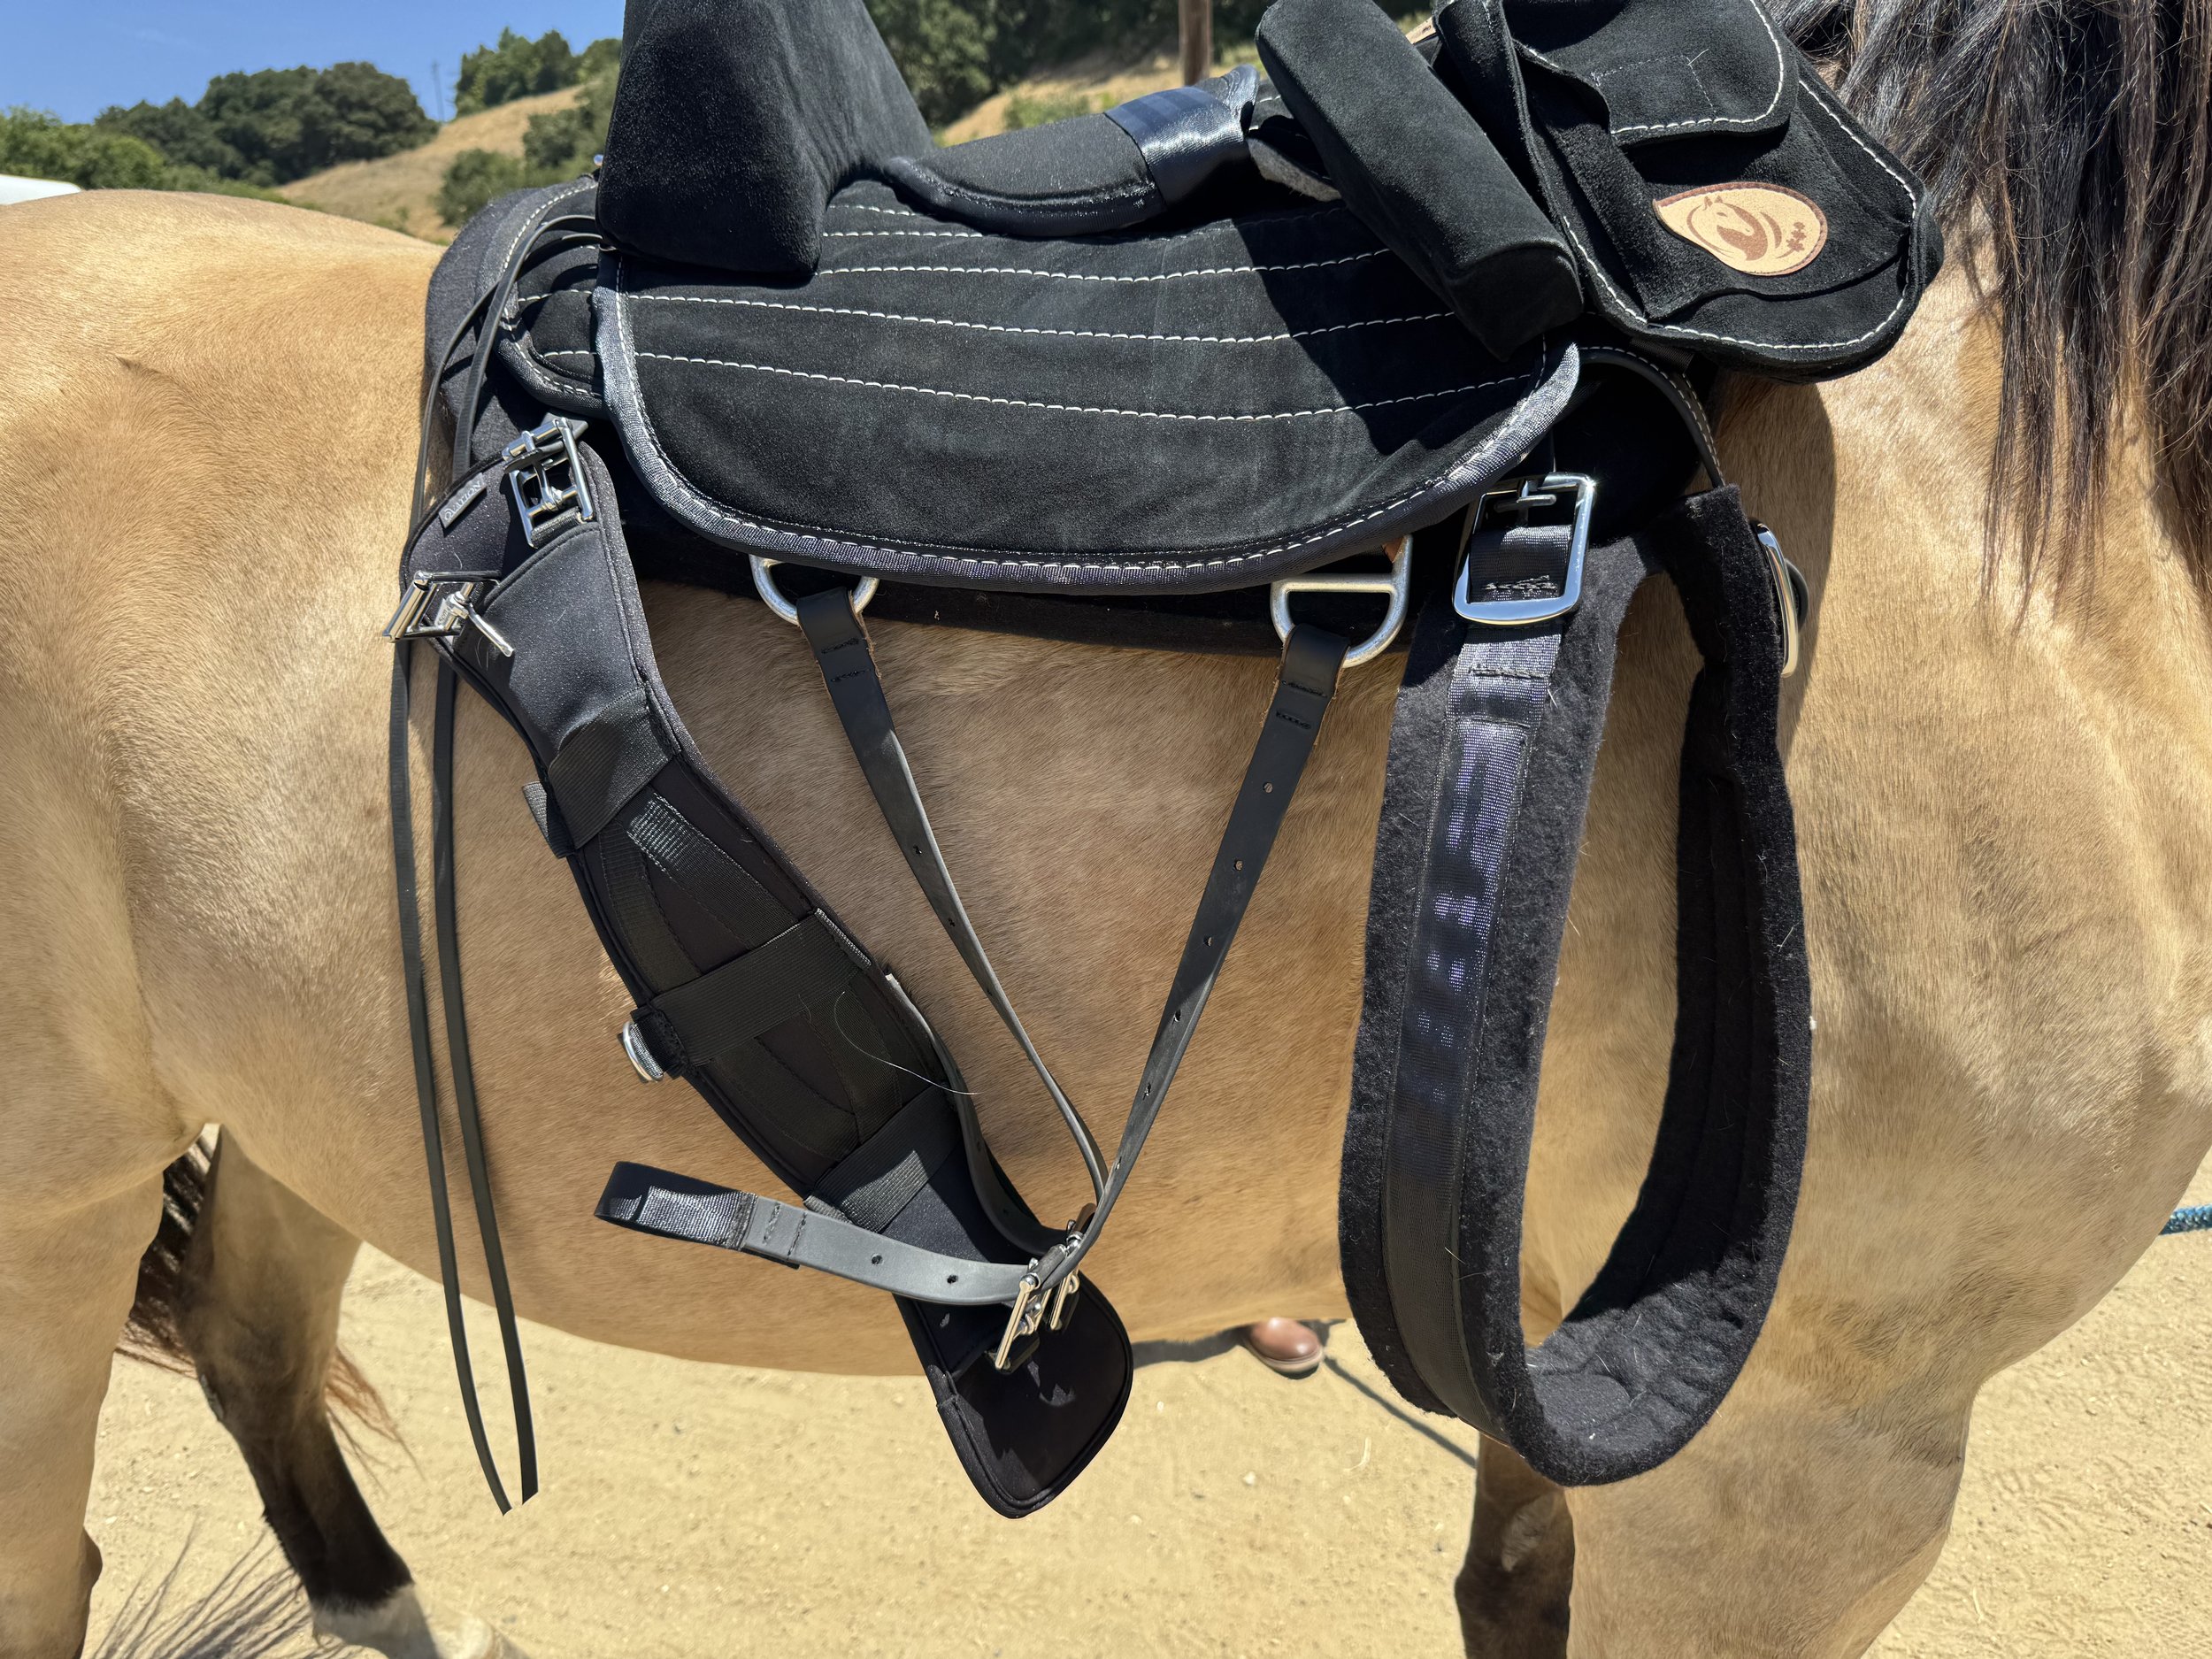
6. Adjusting the Girth
The girth is shipped connected to the right side, and the left side is connected to the storage tab. The girth sizing is intentionally different than what you may be used to for your horse.
Adjust the right side of the girth rigging such that the girth’s d-ring is in the center of the horse’s chest. Then buckle the left side.
-

7. Tightening the Girth
Pull using the end loops to assist with tightening.
-

8. Balancing the Girth
For the front or back straps, it is best to have the straps adjusted to the same number of holes from right and left. Most horses will have the same hole position for front and back straps too.
Depending on the horse, you may have to adjust the front and back straps differently to ensure the girth is located properly on the horses girth notch and not pitching the skin behind the legs.
Do not overtighten! The Union saddle should only be tight enough to keep it from moving when mounting from the ground.
TIP: If the rear strap is tighter, the saddle will tend to push forward in a ride. Likewise, if the front strap is tighter, the saddle MAY shift slightly back as you ride.
Warning: The saddle may loosen on your first ride or two. Check it often to make sure the saddle is secure.
-

9. Ideal Stirrup Position
Adjust the length of the stirrups such that your thigh is parallel to the pommel as shown by the green lines above.
-
10. Balancing the Girth
For the front or back straps, it is best to have the straps adjusted to the same number of holes from right and left. Most horses will have the same hole position for front and back straps too.
Depending on the horse, you may have to adjust the front and back straps differently to ensure the girth is located properly on the horses girth notch and not pitching the skin behind the legs.
Do not overtighten! The Union saddle should only be tight enough to keep it from moving when mounting from the ground.
TIP: If the rear strap is tighter, the saddle will tend to push forward in a ride. Likewise, if the front strap is tighter, the saddle MAY shift slightly back as you ride.
Warning: The saddle may loosen on your first ride or two. Check it often to make sure the saddle is secure.
-

11. Positioning buckles and velcro keeper straps
Pull the fender down or the adjustment strap up until the keeper strap lies across the metal buckle. Tighten the keeper strap to hold the stirrup in place:
-

12. Optional: Add a twist for ankle comfort
Twist the portion of the fender with the copper rivets out towards the front of the horse so that the rivet faces away from the horse.
-

13. Securing the buckle
Tighten the velcro keeper over the buckle as before.
Removing the Saddle
-

1. Breast Collar
Unbuckle the breast collar on the right side and connect that buckle to the storage tab located under the right collar strap
-

2. Girth
Unbuckle the left side of the girth and connect one of the buckles to the storage tab on the rear right side of the saddle.
-
3. Storage
It is best to store your saddle on a saddle stand to maintain its optimal shape. Preferably, the stand will have a wire rack where air can flow to the wool pads. If your saddle is particularly wet after a hot ride, consider letting the underside of the saddle air out in the sun by laying the saddle upside down.